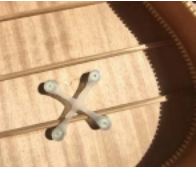
Installing The X-Brace
Preparing and Installing The Internal X-Brace
How To Install The Magnetic X-Brace
The magnetic X-brace lets you attach the ToneWoodAmp securely to your guitar. It uses double-sided 3M tape to adhere to the inside of the guitar’s body and secure the ToneWoodAmp to your guitar with strong magnets.
We describe how to install the X-brace in two phases: First is a practice run so you can explore and understand the internal structure of the guitar before installing the X-brace. The second phase is actually installing the X-brace.
To practice a dry run installing the magnetic X-brace:
1. With the ToneWoodAmp still adhered to the back of your acoustic guitar with the two strips of 3M tape set the guitar top side up on a sturdy, soft surface.
2. Loosen your strings so there is no tension.
Do not expose the adhesive stickers of the magnetic X-brace yet!
3. Insert the magnetic X-brace into the guitar body through the sound hole.
4. Hold the magnetic X-brace at a 45° angle with the back magnets closer to the guitar’s back.
5. Move the magnetic X-brace towards the rear of the guitar until you feel the magnetic attraction between the lower magnets and the ToneWoodAmp on the other side.
6. Allow the two back magnets to rest on the wood first, then let the other front two magnets fall into place.
7. Test that all four magnets pull to the ToneWoodAmp by trying to lift each magnet on the brace. You should feel the same resistance from each magnet before detaching
8. Make sure that no brace, end-pin, or cables are in the way, and remove the magnetic X-brace from the guitar.
To install the magnetic X-brace in its proper position:
1. Remove the thin protective liners from the white double-sided adhesive stickers on the X-brace magnets, leaving the white sticky pads on the magnets.
It is important to make sure the inside of your guitar is free of dust or debris before attaching the stickers Four extra stickers are provided in the ToneWoodAmp packaging in case you make a mistake.
Four extra stickers are provided in the ToneWoodAmp packaging in case you make a mistake.
2. Repeat the steps 3–8 from the practice dry run to place the X-brace but avoid touching the white sticky pads to the wood until you feel your magnetic destination again.
3. After resting the magnets in place and checking with your fingers that all four points of the magnetic X-brace is aligned and magnetically attracted, press down on the magnetic X-brace firmly.
It is now securely adhered to the inside of the guitar.

4. Remove the blue tape used to secure the ToneWoodAmp to the back of the guitar.
The ToneWoodAmp is now securely attached to the guitar using the magnetic X-brace and the suction pad.
The device can now be detached and reattached easily